Getting Started
Benefits Self-Service System - UNI Human Resource Services will no longer accept paper forms for benefits changes and/or updates. Review the Getting Started flyer for a step-by-step beginners guide.
Frequently Asked Questions
- Which internet browsers may I use for Self-Service? Supported browsers are Chrome, Firefox and Edge. Internet Explorer is not supported at this time.
- How do I see what I am currently enrolled in? Once logged in, choose View My Current Benefits.
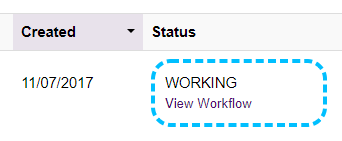
- What action do I need to take when my request is in Working Status? Working Status indicates you have saved changes to one of your benefit options. Working Status shows that the saved changes are pending and have not been submitted to HRS. If you do not want HRS to take action on the request, you can do nothing or you have the option to archive the request.
 To submit a request to HRS for processing that is in Working Status:
- Log into https://java.access.uni.edu/BenefitsSelfService/
- Click once on the View My Self-Service Benefit Requests button.
- Locate the request, then click once on the Pencil icon to modify the request.

- Once you have made the necessary changes, carefully read the "Authorization and Certification" section at the bottom of this web page.
- Check I Agree.
- Click once on the Save Changes button.
- Verify the changes on the "Change Benefits" web page.
- Then scroll down the web page and carefully read the "Authorization and Certification" section for this specific life event.
- Check I Agree.
- Click once on the Submit Changes button.
- I submitted changes, how do I cancel or edit them? Once logged in, choose View My Self-Service Benefit Requests. You may choose to edit incomplete requests by clicking on the pencil icon. You may also change or submit a void request.
- How do I make changes to my benefits? Once logged in, choose Manage My Benefits, then select the appropriate change reason.
- How do I delete a request I made in error? Once a request is created you can archive the request. After a year, all archived requests will be deleted. To archive:
- Access the Benefits Self-Service System at https://java.access.uni.edu/BenefitsSelfService/
- Click on the View My Self-Service Benefit Requests button on the main page.
- Locate the request and click on the Archive button/icon located within the same row on the right side.

- How do I make changes to my benefits after my request was rejected?
- Log into https://java.access.uni.edu/BenefitsSelfService/
- Click once on the View My Self-Service Benefit Requests button.
- Locate the request, then click once on the Pencil icon to modify the request.

- Once you have made the necessary changes, carefully read the "Authorization and Certification" section at the bottom of this web page.
- Check I Agree.
- Click once on the Save Changes button.
- Verify the changes on the "Change Benefits" web page.
- Then scroll down the web page and carefully read the "Authorization and Certification" section for this specific life event.
- Check I Agree.
- Click once on the Submit Changes button.
- How do I change the Life Event or Life Event Date after a request has been rejected?
- Log into https://java.access.uni.edu/BenefitsSelfService/
- Click once on the View My Self-Service Benefit Requests button.
- Locate the request, then click once on the Pencil icon to modify the request.

- When that benefit appears go to the web page and carefully read the "Authorization and Certification" section.
- Check I Agree.
- Click once on the Save Changes button (even though you did not make any changes).
- This will return you to the main "Change Benefits" web page. At the top, under "Your Legal Name", you will see the life event listed and a Change button. Click once on this button.
- This will bring you back to the "I am Making a Change" web page. You can now modify the reason and/or date.
Note: This will reset all your benefit requests, as the system will now display the benefits you are eligible to enroll in, or change, based on this new date. - Once you have changed the reason and/or date, click once on the Continue button.
- The "Change Benefits" web page will reappear, make all the necessary changes to your benefits.
- Once you have made all the changes and verified the changes, then scroll down the "Change Benefits" web page and carefully read the "Authorization and Certification" section for this specific life event.
- Check I Agree.
- Click once on the Submit Changes button.
- How do I print my changes?Once a request is created and submitted, you can print the detailed information about the change. To print:
- Access the Benefits Self-Service System at https://java.access.uni.edu/BenefitsSelfService/
- Click on the View My Self-Service Benefit Requests button on the main page.
- Locate the request and click on the Print button/icon located within the same row on the right side.

- I am making changes to my FSA but it shows my current election already in the amount field, how do I make a change? You may delete your current amount and type in a new amount in the Employee Contribution (Annual) box. Once changes are finalized you may click on "I agree" then click on Save Changes.
- I am unable to upload the documentation requested for my life event, how do I provide this to HRS? If you are unable to upload, you may fax, mail, or hand deliver your supporting documentation to HRS. Please be advised of the deadline date the documentation is due by, requested changes will not be processed if required documentation is not provided.
- Social Security numbers are included on my required documentation, is it safe to upload? Please redact (blackout) Social Security numbers on the copy you are uploading. Once documentation has been verified by HRS it will be purged from the system.
- I am being asked to redact the Social Security numbers on my required documentation that I am uploading, what does that mean? Redacting is blacking out the numbers so you are unable to see them on the documentation once uploaded. Some examples are: if this is on paper you may using a piece of paper or something to cover the numbers, or if this is a picture file you may edit and cover the numbers with color or cropping.
- How do I let HRS know I will not be uploading the required documentation? In the Life Event Documentation section click on the box next to the sentence at the bottom that states, "Instead of uploading, I will provide documentation within 30 days of the qualifying life event date by fax, mail or hand deliver to Human Resource Services. Requested changes will not be processed if Required documentation is not provided."
- I experienced a Life Event and want to update my Tax-Deferred Annuity amount why is it not showing in my list of options? TDA’s do not require a life event for a change. Once you have made all applicable changes due to your life event, you may then choose "I am Enrolling in or Changing My Tax-Deferred Annuity" under Manage My Benefits to make updates to your TDA.
- I have not experienced a Life Event and want to cancel my Voluntary Term Life insurance how do I make the cancellation? VTL does not require a life event for a change. You may choose "I Want to Cancel My Voluntary Term Life Policy" under Manage My Benefits to cancel your VTL insurance. You can use this life event to cancel your spouse or child VTL as well.
- I need to make a change to my Dependent Care FSA amount, how do I make the changes? You may choose "I am Having a Change in Dependent Care Cost" under Manage My Benefits to make applicable changes. No documentation is required for this event.
- Why does it show annual and monthly options when electing the amount to contribute to a Tax-Deferred Annuity? We wanted to offer the flexibility of choosing one or the other without having to do the math yourself on the contribution amounts.
- I made all my changes how do I submit them for processing? Click on the Submit All Changes button at the bottom of the page.
- How do I view or update my beneficiary? Once logged in, choose My Beneficiaries.
- Will changes I make for my Beneficiary through Self-Service also be changed through TIAA and/or IPERS? Changes and updates to beneficiary information through self-service is for Life Insurance only. If you need to make changes to your beneficiaries for TIAA you may access your account at TIAA.org and change your beneficiary designations. To make changes for IPERS you may complete their form and return the form to HRS or you may fax it back directly to IPERS at 515-281-0053.
- When I view my benefit requests, what does the "Status" mean?
- WORKING: The user started a benefit request and has made changes to a benefit, but has not yet submitted to HRS for processing. Additional action is still required to finalize benefit changes.
- INCOMPLETE: The user started a request, but has not made any changes to a benefit. Additional action is still required to finalize benefit changes.
- WF-SUBMITTED: The request has been submitted and is in workflow (WF), and is waiting for the HRS Benefits Team to review/approve.
- WF-DELEGATED: The request has been submitted and HRS has delegated it to a team member for review.
- WF-PENDING: The request has been submitted and HRS has placed it in a pending status before processing. Typical reasons for placing a request into a pending status are: 1) HRS has sent an email to the employee asking for more information or 2) if the request is a future dated request (therefore, data entry would happen closer to when the request is effective).
- WF-REJECT: The request had been submitted but was rejected by HRS. The user must take action if the benefit change needs to be resubmitted.
- WF-APPROVED - Benefits: The request has been submitted, the HRS Benefits Team has approved, and now waiting for the Data Entry Team to complete.
- WF-COMPLETE: HRS has processed the request within e-Business Suite. No action is needed.
- ARCHIVED: Placing a request into an archived status will remove it from the default view, and after a year the "unused" request will be deleted from the system.
- VOIDED: The request was voided.
- MISSED DEADLINE: The life event deadline was not met.
